Controlling a servo motor with a switch can be a simple and effective way to add movement to your electronics project.
However, you must understand how to control a servo with a switch.
In this case, reading the article will help you control the servo using the switch efficiently and be aware of some testing and troubleshooting.
We also discuss some applications for your better convenience.
Understanding Servos and their Importance in Control Systems
A servo is a small electronic device that is designed to receive control signals and translate them into precise movements.
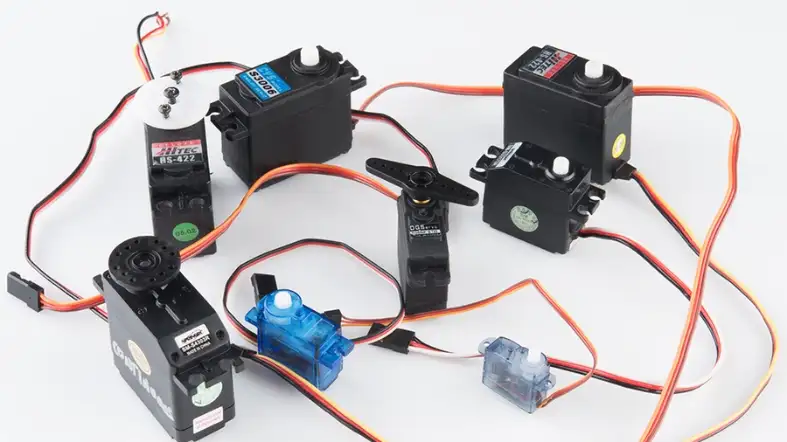
The device consists of a motor, a set of gears, and a feedback mechanism that allows it to accurately position itself according to the input it receives.
Servos are commonly used in a variety of applications, including robotics, automation, and control systems, where precise movement control is necessary.
The key benefit of using servos is their high precision and accuracy.
They are capable of very fine movements and can position themselves with great accuracy, making them ideal for tasks that require precise motion control.
In addition, servos are compact and lightweight, making them simple to incorporate into a broad range of devices.
To control a servo, you need to provide it with a control signal that tells it where to position itself.
This signal is typically a PWM) signal that encodes information about the desired position of the servo.
The length of the pulse determines the position of the servo where the shorter pulses show a lower position. Likewise the longer pulses indicate a higher position.
To generate the control signal, you need to use a microcontroller or other electronic device that is capable of producing PWM signals.
This device receives input from sensors or other sources, processes the data, and generates the PWM signal that is sent to the servo.
How To Control A Servo With A Switch?
Follow these simple steps to control a servo with a switch efficiently:
Required Materials
To control a servo with a switch, you will need a few materials. These include a servo motor, a switch, a battery, a breadboard, jumper wires, and a microcontroller.
Make sure to choose the correct size of servo motor for your project and that the switch is rated for the voltage of your battery.
Wiring the Circuit
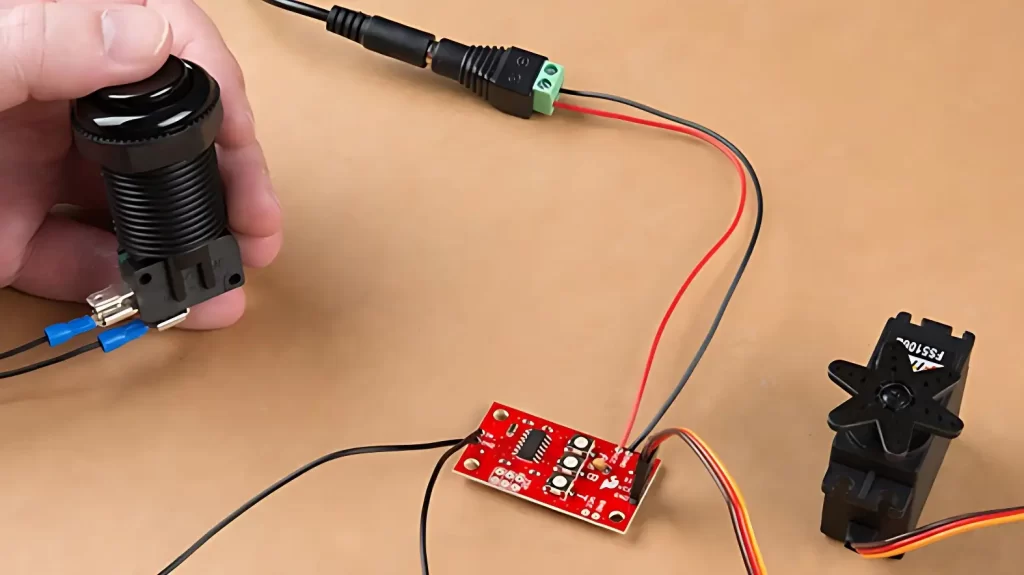
The first step to controlling a servo with a switch is to wire the circuit correctly. Begin by placing the microcontroller and the switch on the breadboard.
Connect the switch to the microcontroller using a jumper wire. Next, join the power supply to the breadboard and the microcontroller.
Attach the servo motor to the breadboard and join it to the microcontroller using jumper wires.
It’s important to connect the signal wire of the servo motor to the correct pin on the microcontroller.
Consult the datasheet for your particular microcontroller to determine which pin to use.
Programming the Microcontroller
The final step is to program the microcontroller to control the servo motor with the switch.
It’s need to use any programming language to make the job done that the microcontroller supports.
Begin by initializing the microcontroller and setting up the pin for the switch as an input.
Next, set up the pin for the servo motor as output and initialize the servo motor.
Then, create a loop that reads the state of the switch and sends a signal to the servo motor to move it to a specific position.
It’s vital to test your code and make adjustments as needed. You may also want to add additional features, such as limiting the range of motion of the servo motor or adjusting the speed of the movement.
Testing and Troubleshooting: Make Sure your Servo is Responding to the Switch Correctly
After installing a servo and connecting it to a switch or controller, it’s important to test it to ensure that it’s responding correctly.
Here are some steps to follow for testing and troubleshooting your servo:
Power on the Servo
First, power on the servo and make sure that it’s receiving power. Check the wiring and connections to make sure that everything is perfectly connected.
Check the Switch
Next, check the switch or controller that you’re using to control the servo. Make sure that it’s functioning properly and sending the correct signals to the servo.
Verify Servo Movement
With the switch in the correct position, verify that the servo is moving as expected.
If it’s not moving, check the wiring and connections again to make sure that everything is properly connected.
Test Different Positions
Move the switch to different positions and verify that the servo is moving to the correct position each time.
If it’s not moving to the correct position, check the control signals being sent to the servo.
Check for Jerky Movements
If the servo is moving in a jerky or uneven way, it may be a sign of a problem with the wiring, connections, or control signals.
Check these components and ensure that everything is working perfectly.
Test under Load
Finally, test the servo under load to ensure that it can handle the intended load and still move smoothly and accurately.
If it’s not performing well under load, it may be necessary to adjust the control signals or replace the servo with a more powerful one.
By following these steps, you can test and troubleshoot your servo to ensure that it’s responding correctly and functioning properly.
If you’re still experiencing troubles, it may be necessary to consult with an expert or replace the servo altogether.
Creative Applications of Servo Switches in Projects

Servo switches can be used in a wide variety of projects to control the movement of objects and devices. Here are some ideas for projects that utilize servo switches:
Robotic Arm
Build a robotic arm that uses servo switches to control the each joint’s movement.
This can be used for picking up and moving substance, or for more difficult tasks like assembling parts.
Automated Blinds
Create an automated blinds system that uses servo switches to open and close the blinds based on a timer or light sensor.
Camera Gimbal
Build a camera gimbal that uses servo switches to stabilize the camera and keep it level while moving.
This is useful for creating smooth video footage while walking or moving.
RC Airplane
Use servo switches to control the movement of an RC airplane’s control surfaces, such as the ailerons, elevator, and rudder.
This allows for precise control of the plane’s movement while in flight.
Animatronic Puppet
Create an animatronic puppet that uses servo switches to control the movement of its limbs, head, and other body parts.
This can be used for activity or educational purposes.
Solar Panel Tracker
Build a solar panel tracker that uses servo switches to adjust the angle of the solar panel throughout the day to maximize its exposure to the sun.
DIY CNC Machine
Construct a DIY CNC machine that uses servo switches to control the movement of the cutting head.
This allows for precise and automated cutting of materials like plastic, wood, and metal.
These are just a few examples of the many creative ways that servo switches can be used in projects.
By incorporating servo switches into your projects, you can achieve precise control of movement and create devices that are more efficient, effective, and fun to use.
FAQs
What Programming Language Is Used To Control A Servo With A Switch?
The programming language used to control a servo with a switch will depend on the specific controller being used.
Popular options include Arduino code (C++) or Python code for Raspberry Pi.
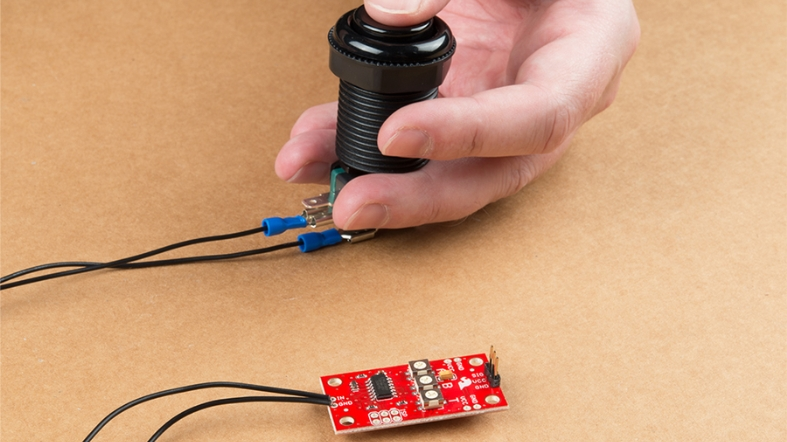
How Do I Connect The Switch To The Servo And Controller?
The switch should be connected to the controller using its input pins, and the controller should be connected to the servo using its output pins.
The exact pin connections will depend on the specific controller and servo being used.
Can I Control Multiple Servos With A Single Switch?
Yes, it is possible to control multiple servos with a single switch by using a controller that supports multiple output pins.
However, you will need to make sure that the controller can provide enough power to drive all of the servos at once.
Final Words
Controlling a servo with a switch is a useful skill for a variety of projects, from robotics to home automation.
By following these steps and using the proper materials, you can easily create a circuit and program a microcontroller to control a servo motor with a switch.
Remember to double-check your wiring and test your code thoroughly to ensure everything is working properly.