Have you ever wondered how to mount an RC body without drilling unsightly holes that could potentially weaken the structure?
Is it even possible to achieve a clean, professional look while maintaining the integrity of your RC vehicle?
Well, you’re in for a treat, as we’re about to reveal the secrets of mounting an RC body without holes!
In this article, we’ll introduce an innovative method that not only maintains your RC body’s aesthetics but also preserves its strength. Say goodbye to the days of drilling and compromising your precious RC body!
Now that we’ve piqued your interest, it’s time to dive into the nitty-gritty details.
How To Mount RC Body Without Holes: Magnetic Mounting System
This method not only enhances the aesthetics of your vehicle but also allows for easy removal and attachment of different RC bodies, giving you more versatility and flexibility in your hobby.
Choose the Right Magnetic Mounting System
Consider the size, weight, and type of your RC body when making your choice.
A strong magnetic mounting system will keep the body securely in place during high-speed maneuvers and rough terrain.
Gather Necessary Tools and Supplies
You’ll require strong neodymium magnets, a ruler, a marker, a hobby knife, super glue or epoxy, and some masking tape.
Having all your supplies ready will make the process smoother and more efficient.
Measure and Mark Magnet Placement
Determine the appropriate placement for the magnets on both the RC chassis and the body.
Measure and mark the locations, ensuring they align perfectly when the body is mounted.
Precision is crucial to maintain the body’s stability and overall performance of your RC vehicle.
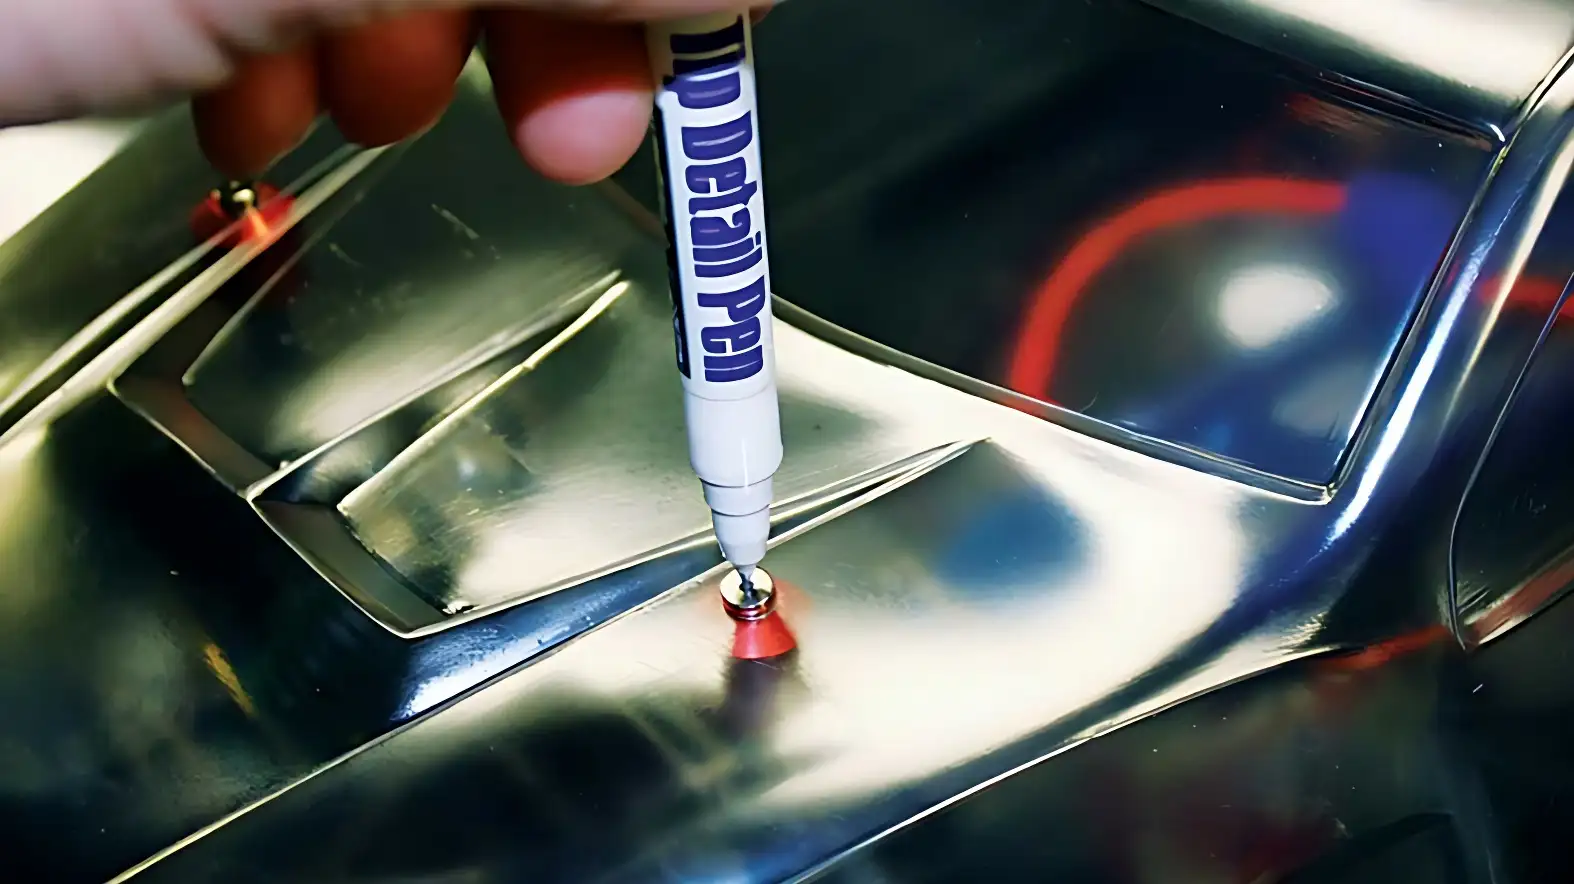
Attach Magnets to the Chassis
Clean the areas on the chassis where the magnets will be placed to ensure a strong bond.
Apply a small amount of super glue or epoxy to the marked locations and place the magnets with the correct polarity facing up.
Hold each magnet firmly in place for a few seconds to allow the adhesive to set.
Be mindful of the adhesive’s drying time, as it may vary depending on the product you’re using.
Attach Magnets to the RC Body
Before attaching magnets to the RC body, double-check the polarity of the magnets on the chassis.
The magnets on the body should be facing the opposite direction to ensure they attract each other.
Apply masking tape to the inside of the RC body to reinforce the area where the magnets will be placed.
This will help distribute the force and minimize the risk of damage during use.
Apply super glue or epoxy to the marked locations on the RC body, and firmly press the magnets in place, ensuring they align with the magnets on the chassis.
Hold each magnet for a few seconds to let the adhesive set.
Test the Magnetic Mounting System

Allow the adhesive to fully cure before testing your magnetic mounting system.
Once the adhesive has dried, gently place the RC body on the chassis, making sure the magnets are aligned correctly. The body should snap into place securely.
Test the strength of the mounting system by shaking your RC vehicle gently and observing if the body remains firmly attached.
If it feels loose, you may need to add more magnets or adjust their placement to ensure a stronger connection.
Enjoy Your Hole-Free RC Body
With your magnetic mounting system now securely in place, you can enjoy the sleek appearance of your RC vehicle without any visible mounting holes.
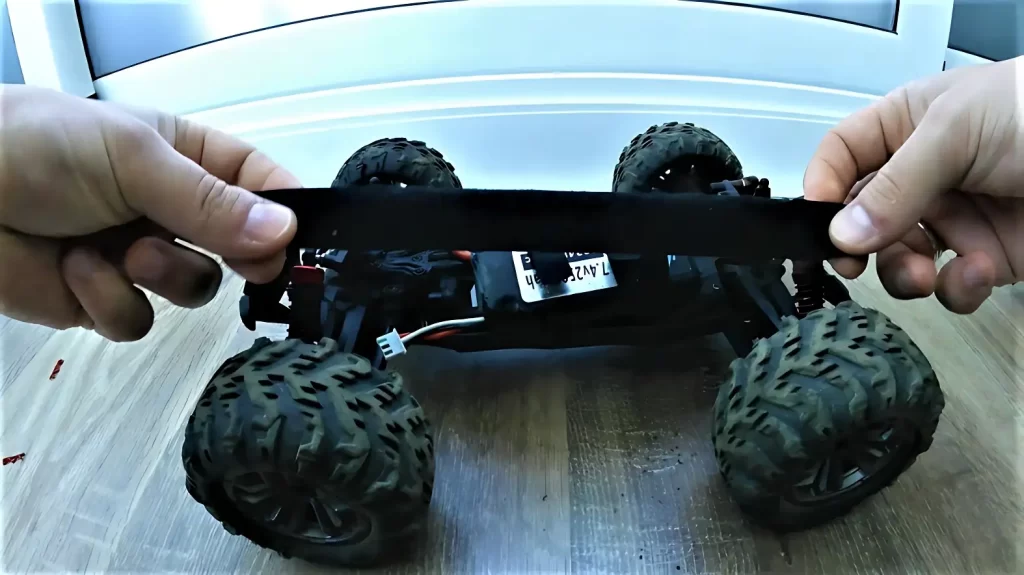
How To Mount RC Body Without Holes: Velcro Attachment Technique
Using the Velcro attachment technique, you can easily remove and swap out your RC body without causing any damage.
Enjoy the versatility and convenience of this simple yet effective mounting method!
Gather Your Materials
To successfully mount your RC body using the Velcro attachment technique, first, gather the necessary materials. You will need:
- RC car body
- Velcro tape (both hook and loop sides)
- Scissors
- Rubbing alcohol or cleaning solution
- Clean cloth or paper towel
- Marker or pen
Clean the Surfaces
Before you attach the Velcro, it’s crucial to clean both the RC body and the chassis. Dirt, grease, or dust can weaken the bond between the Velcro and the surfaces.
Use rubbing alcohol or a cleaning solution to wipe down both surfaces with a clean cloth or paper towel. Allow them to dry thoroughly.
Cut and Position the Velcro Strips
Using your scissors, cut the Velcro tape into strips. The length and width will depend on the size of your RC body and chassis, but make sure they are large enough to secure the body firmly.
Lay out the hook side of the Velcro on the chassis and the loop side on the inside of the RC body.
Use a marker or pen to mark the spots where you want to place the Velcro. Aim for equal distribution of the strips, focusing on areas that will bear the most weight.
Attach the Velcro Strips
Peel off the backing from the hook side of the Velcro and carefully attach it to the marked spots on the chassis. Press firmly to ensure a strong bond.
Repeat the process with the loop side of the Velcro, attaching it to the inside of the RC body.
Make sure the Velcro strips align correctly when the body is placed onto the chassis.
Mount the RC Body
Now that you have secured the Velcro strips, it’s time to mount the RC body onto the chassis.
Carefully align the RC body with the chassis and press down firmly, making sure the Velcro strips on the body and chassis connect securely.
The Velcro attachment technique should hold the RC body in place without the need for holes or additional fasteners.
Test Your RC Car
With your RC body mounted using the Velcro attachment technique, it’s time to test your RC car.
Drive it around to ensure that the body remains secure during operation.
If you notice any instability, you may need to adjust the Velcro strip placement or add more strips to enhance the stability of the body.
How To Mount RC Body Without Holes: Double-Sided Tape Solution
Choose the Right Double-Sided Tape
First, pick a high-quality double-sided tape designed specifically for mounting RC bodies.
You want a tape that is strong, durable, and resistant to moisture and temperature changes.
Automotive-grade tapes, such as 3M VHB or Gorilla Mounting Tape, are great options for this purpose.
Clean and Prep the RC Body and Chassis
Before attaching the tape, clean both the RC body and chassis thoroughly to ensure a secure bond.
Use rubbing alcohol and a lint-free cloth to remove any dirt, grease, or residue from the surfaces. Allow them to dry completely before proceeding to the next step.
Measure and Cut the Tape
Next, measure the areas on the chassis where the body will be attached, and cut pieces of double-sided tape to fit those areas.
Keep in mind that you want the tape to be evenly distributed to ensure a balanced and secure fit.
It’s better to use several smaller pieces of tape rather than one long strip, as this will provide better overall support.
Apply the Tape to the Chassis
Now, it’s time to apply the tape to the chassis. Peel off one side of the backing and press the tape firmly onto the designated areas.
Make sure you apply even pressure to ensure a strong bond. Then, remove the second backing from the tape, exposing the adhesive side that will attach to the RC body.
Align and Attach the RC Body
Carefully align the RC body with the chassis, making sure the tape lines up with the corresponding attachment points.
Gently press the body onto the tape, applying even pressure across all the taped areas. This will ensure that the body adheres securely to the chassis.
Test the Fit and Make Adjustments
Finally, test the fit of your RC body by gently lifting it from the chassis. If it feels secure and stable, you’ve successfully mounted your RC body without holes!
If the body feels loose or unstable, you may need to add more tape or reposition the existing tape for a better fit.
Remember, although double-sided tape is a great solution for mounting your RC body without holes, it may not be as strong as traditional mounting methods.
Check the bond periodically and replace the tape as needed to maintain a secure fit.
Essential Tips for Maintaining Your Hole-Free RC Body Mount
By following these essential tips, you can keep your RC body mount hole-free and in top condition, ensuring a more enjoyable and successful RC racing experience.
Choose the Right Body Mount Material
To maintain a hole-free RC body mount, start by selecting high-quality material.
Durable materials like aluminum or high-impact plastic withstands the rigors of RC racing and prevents unnecessary wear and tear.
As you research your options, consider the specific needs of your RC car, as well as your budget and personal preferences.
Install Body Clips Securely
Proper installation of body clips ensures a secure connection between the body mount and the RC car body.
When attaching the clips, make sure they fit snugly and hold the body in place without causing undue stress or strain.
A secure fit prevents vibrations and movement during racing, reducing the risk of holes developing over time.
Inspect and Clean the Mount Regularly
Regular inspections and cleaning of your RC body mount are essential to maintaining its integrity. Look for signs of wear, cracks, or holes, and address any issues immediately.
To clean the mount, remove the RC car body and use a soft brush or cloth to gently remove any dirt or debris.
Avoid using harsh chemicals or abrasive materials, as these can cause damage to the mount.
Adjust the Mount as Needed
Over time, your RC body mount may require adjustments to ensure proper alignment and fit.
If you notice any misalignment or gaps between the body and the mount, make the necessary adjustments to correct the issue.
Ensuring proper fit and alignment helps prevent the development of holes and extends the life of your RC body mount.
Reinforce Vulnerable Areas
In some cases, reinforcing vulnerable areas of your RC body mount can help prevent holes from developing.
Use materials like fiberglass, carbon fiber, or high-impact plastic to add extra support to areas prone to wear or damage.
Reinforcement not only protects your mount but also enhances the overall performance of your RC car.
Replace Damaged Mounts Promptly
If your RC body mount becomes damaged or develops holes, replace it promptly to avoid further issues.
Continuing to use a damaged mount can lead to more extensive damage to your RC car body and impact its performance.
Keep spare mounts and other essential parts on hand, so you can quickly address any problems and get back to enjoying your RC racing experience.
Troubleshooting Common Issues with Hole-Free Mounting Methods of RC car
Hole-free mounting methods are essential for protecting the body of your RC car from unnecessary damage.
However, there might be some issues that you encounter when using these methods.
Here are some common problems and solutions related to hole-free mounting techniques:
Adhesive not holding properly
- Ensure the surface of the RC car body and the mounting parts are clean and free of debris or grease.
- Use high-quality, double-sided mounting tape or adhesive specifically designed for RC cars.
- Apply enough pressure when mounting the parts to ensure proper adhesion.
Mounting system causing body flex or distortion
- Select mounting systems that evenly distribute the pressure across the body of the RC car.
- Make sure the mounting points do not obstruct any moving parts or wheels.
- Use lightweight mounting systems to minimize added weight and stress on the body.
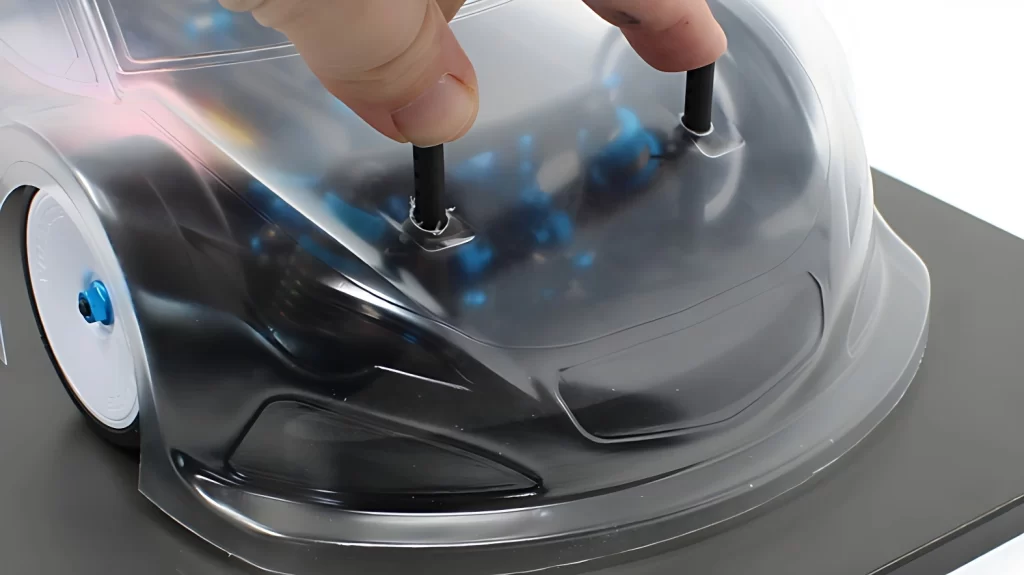
Difficulty aligning the body and the chassis
- Before mounting, align the body to the chassis and mark the positions of the mounting points.
- Use a body reamer or a small round file to create precise holes for the mounting posts or magnets.
- Adjust the body posts or magnets to ensure proper alignment and secure fit.
Mounting system interfering with suspension or handling
- Check that the mounting system doesn’t obstruct the suspension components or restrict their movement.
- Make sure the mounting system doesn’t add too much weight or shift the center of gravity, which may affect handling.
- Reassess the mounting points and adjust them if necessary to avoid interference with the suspension or handling.
Mounting system is not secure enough
- Inspect the mounting system for any loose or missing components, and tighten or replace them as needed.
- Use a combination of mounting systems, such as body clips and magnets or Velcro and mounting tape, for added security.
- Periodically check the mounting system for wear and tear and replace it as necessary.
Difficulty removing or replacing the body
- Ensure the mounting system allows for easy removal and replacement of the RC car body.
- If using magnets, make sure the strength is sufficient for secure mounting but still allows for easy removal.
- If using Velcro, ensure the pieces are properly aligned and the adhesive has fully cured before attempting to remove or replace the body.
By addressing these common issues, you’ll be able to enjoy a secure and hole-free mounting system for your RC car while minimizing damage to the body.
Optimize Your RC Experience with a Hole-Free Body Mounting System
Experience Enhanced Aesthetics
A hole-free RC body mounting system lets you maintain the sleek, unblemished look of your RC car or truck.
Without the need for unsightly holes, you’ll enjoy a more visually appealing vehicle.
Take pride in your RC model and display it without distractions, capturing the admiration of fellow enthusiasts.
Preserve the Integrity of Your RC Body
By avoiding holes in your RC body, you keep its structural integrity intact. This reduces the risk of cracks, wear, and damage, extending the lifespan of your model.
The stronger your RC body, the better it withstands the rigors of use, ensuring you get more bang for your buck.
Enjoy Easy Installation and Removal
With a hole-free body mounting system, you’ll appreciate the convenience of easy installation and removal.
This system typically employs magnets or clips, which allow for quick and effortless changes.
You can switch between different RC bodies with ease, making it simpler to maintain or modify your vehicle.
Benefit from Increased Versatility
A hole-free mounting system offers greater versatility, as it’s compatible with a range of RC bodies.
This allows you to easily upgrade or customize your RC model without worrying about compatibility issues.
Experiment with different designs and styles, and find the perfect look to suit your tastes.
Improve Performance and Handling
By eliminating the need for holes, a hole-free body mounting system can contribute to better performance and handling.
The absence of holes reduces the risk of debris, dust, or water entering the chassis, which can interfere with the internal components.
With a well-protected vehicle, you’ll enjoy smoother rides and enhanced control.
In summary, investing in a hole-free RC body mounting system offers numerous advantages.
You’ll enjoy improved aesthetics, structural integrity, convenience, versatility, and performance. Enhance your RC experience and make the most of your hobby with this innovative solution.
FAQs
How Can I Mount An RC Body Without Drilling Holes?
There are several methods to mount an RC body without drilling holes, including using strong double-sided tape, hook, and loop fasteners (e.g., Velcro), or magnetic body mounts.
Each method offers its advantages and disadvantages in terms of strength, durability, and ease of use.
Can I use double-sided tape to mount my RC body?
Yes, you can use strong double-sided tape to mount an RC body without holes.
However, it may not be as secure as other methods and may require frequent replacement due to wear or exposure to dirt and moisture.
Ensure the surfaces are clean and dry before applying the tape for maximum adhesion.
How Do I Install Hook And Loop Fasteners To Mount My RC Body?
To install hook and loop fasteners (e.g., Velcro), cut strips to fit the mounting points on both the chassis and the inside of the body shell.
Attach the hook side to the chassis and the loop side to the body, ensuring the surfaces are clean and dry.
Press the body onto the chassis, aligning the fasteners for a secure fit.
Are There Any Drawbacks To Mounting An RC Body Without Holes?
While mounting an RC body without holes can provide a clean and sleek appearance, it may not be as secure as traditional body post-mounting systems.
The body may be more prone to detaching during impacts or rough driving conditions.
Additionally, some alternative mounting methods may require more maintenance or replacement of components over time.
Final Words
Mounting an RC body without holes is an innovative and aesthetically pleasing approach to attaching the body to the chassis.
By utilizing alternative methods such as magnetic mounts, Velcro, or body clips with custom brackets, hobbyists can preserve the integrity and appearance of their RC vehicles.
These solutions not only offer a clean and seamless look but also simplify the process of removing and reattaching the body for maintenance or customization.
It is essential, however, to carefully consider the strength and durability of the chosen method to ensure a secure and long-lasting connection between the body and chassis.